Walkthrough
Create a Codex Workspace from a Project Folder
Codex needs one folder on your computer before it can read or change any files. Point it at the right folder, and every conversation you start from that project can see and edit what is inside.

Attach the project folder you want Codex to work inside
- 1
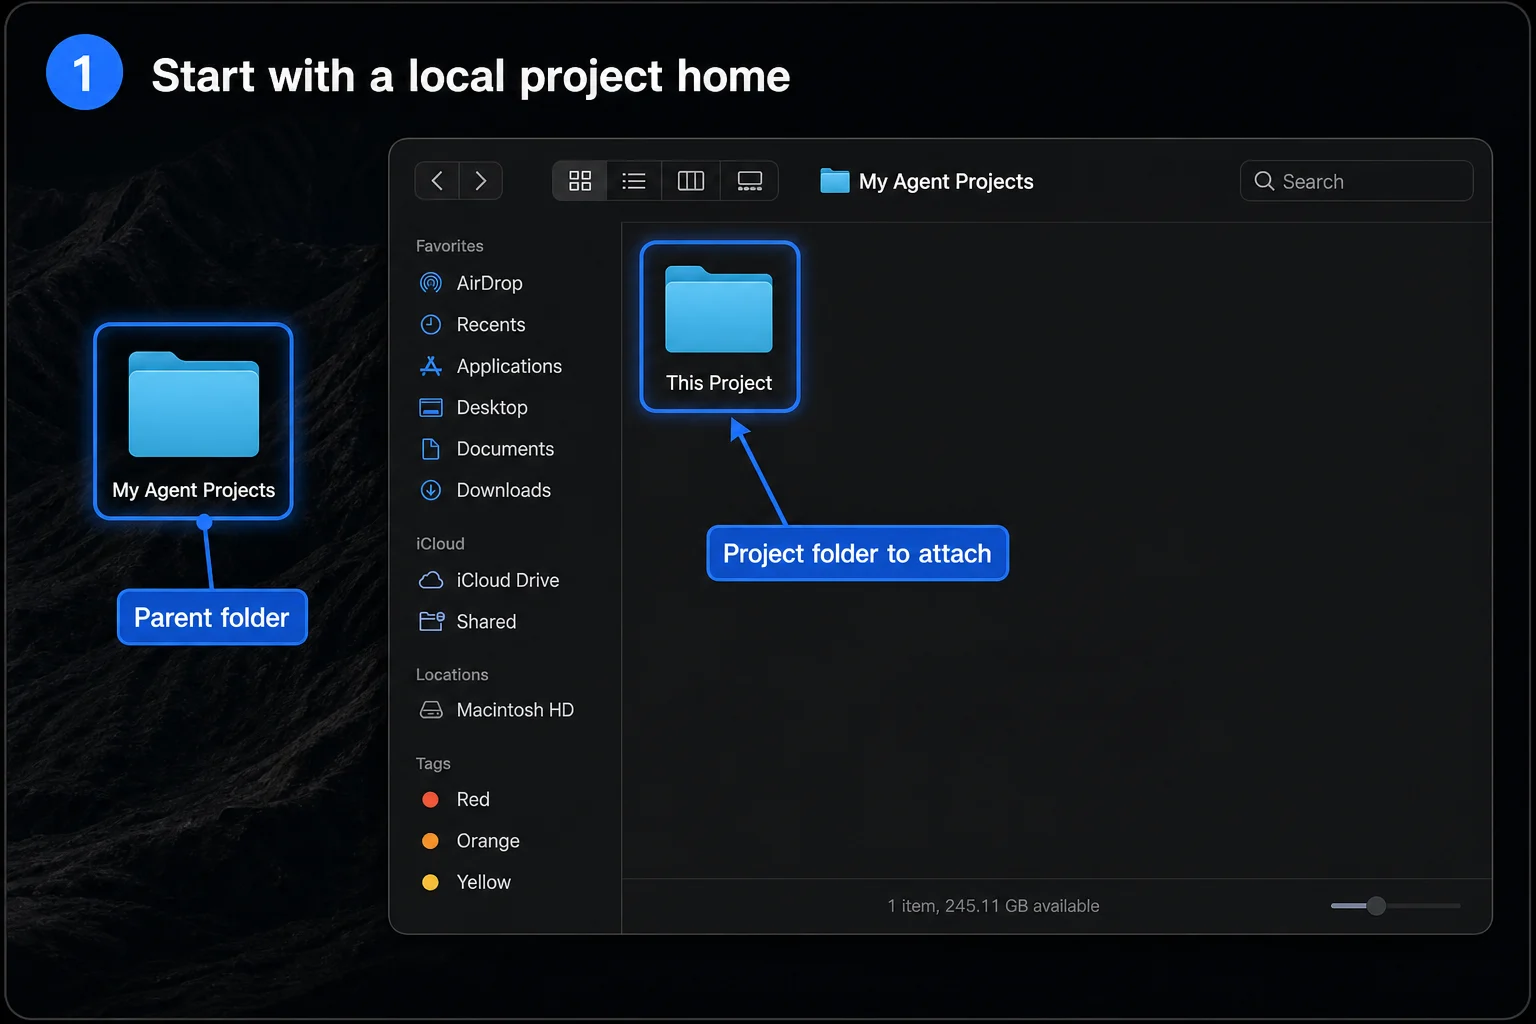
Decide which folder Codex will use as its entire working area
- 2
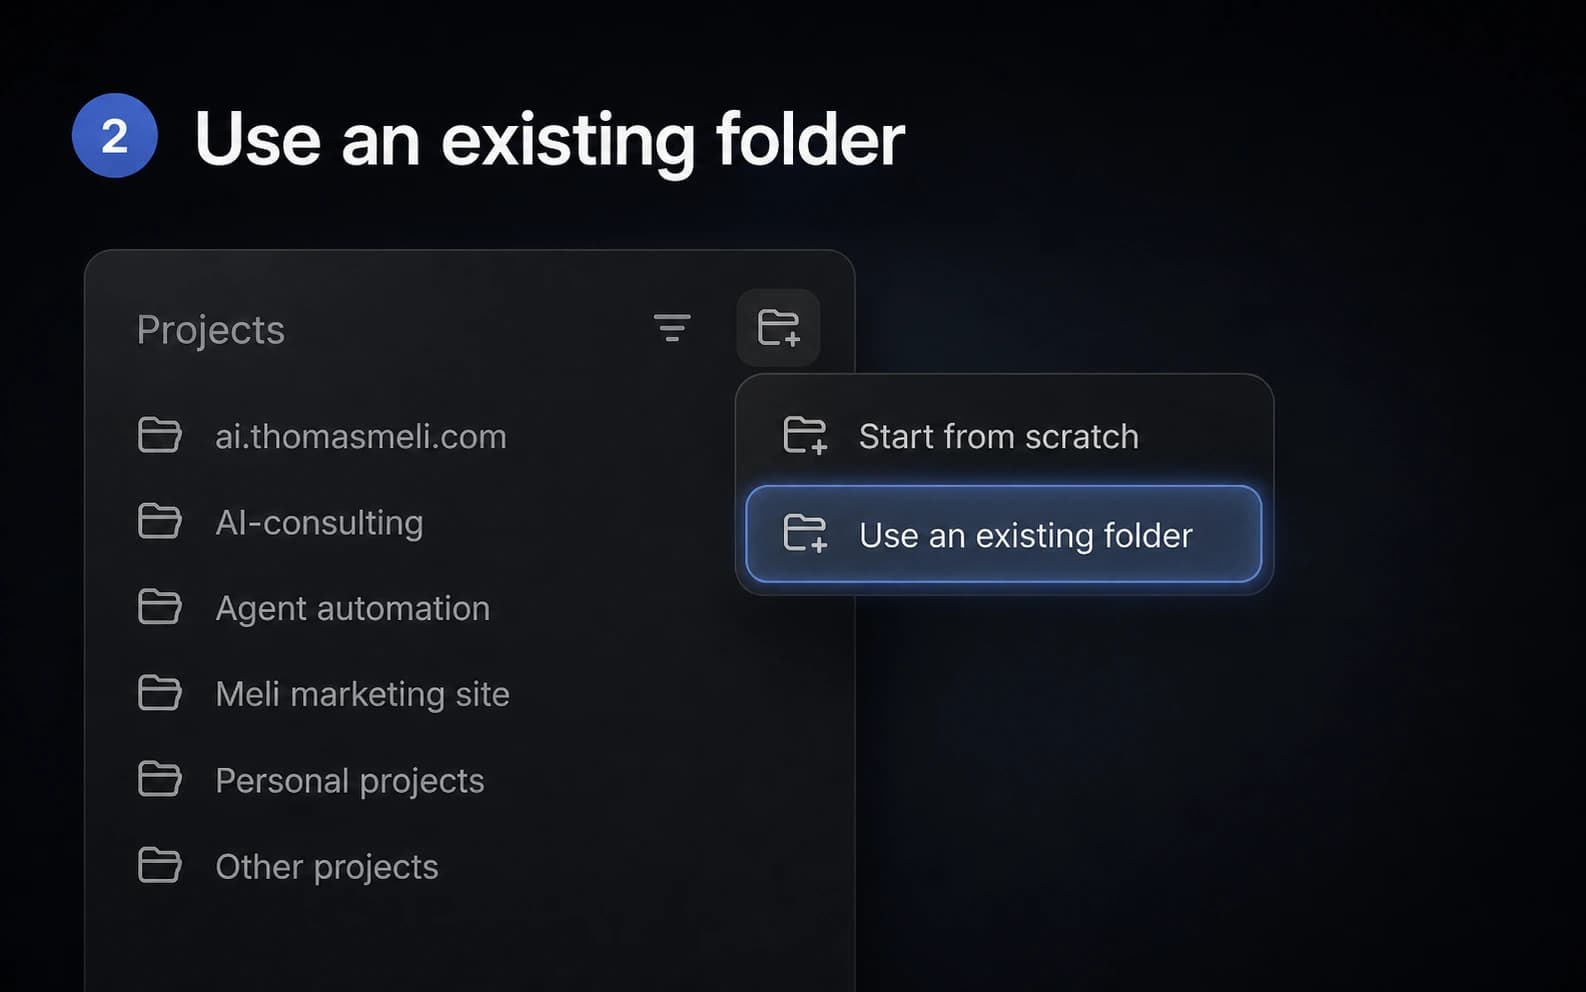
Tell Codex to use your existing folder instead of creating a new one
- 3
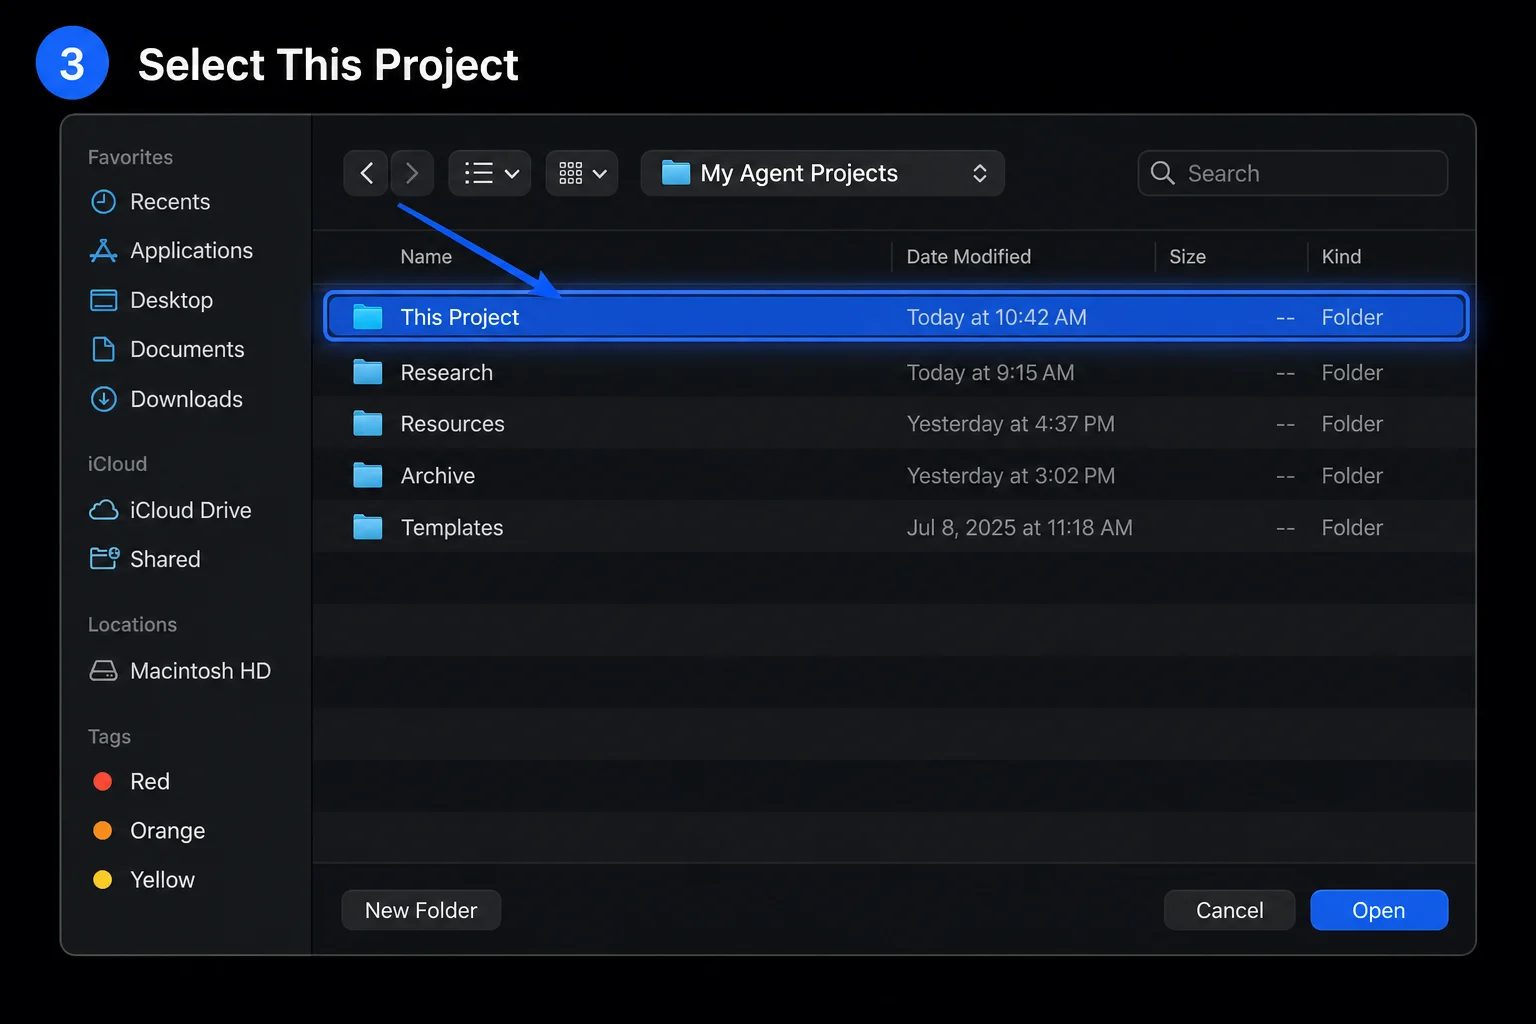
Select the specific project folder, not the parent
- 4
Confirm the project name and Local mode before sending your first message
A Codex project for `This Project` with a new Local thread started inside that attached folder.
Attach a folder and start the first project thread
- 1
Decide which folder Codex will use as its entire working area
When you attach a folder to Codex, that folder becomes the boundary of everything Codex can read, create, and edit. Nothing outside that folder exists to Codex. Name your folders whatever fits your work. This example uses `My Agent Projects` as a parent folder for organization, with `This Project` as the project folder inside it. You will select the project subfolder in Codex, not the parent.
Tip: The parent folder is just for organization. The project subfolder is the one you will select in Codex.
- 2
Tell Codex to use your existing folder instead of creating a new one
Open the Codex sidebar, find the `Projects` section, and click the + button next to it. A menu appears with two choices. Choose `Use an existing folder` so Codex points at the folder you already have on your computer. Your operating system opens a standard folder picker.
Tip: `Start from scratch` creates a brand-new empty folder on your computer. `Use an existing folder` is what you pick when you already have a folder set up with files in it.

- 3
Select the specific project folder, not the parent
The folder you select here becomes the project name in Codex, so pick the specific project folder you want Codex to work inside. In the folder picker, navigate into your parent folder if you made one, select `This Project`, and click `Open`. Codex adds `This Project` to the Projects list in the sidebar.
Tip: `This Project` is only the example name used in this walkthrough. If your folder is called `2nd-brain`, `personal-os`, or anything else, select that folder instead.

- 4
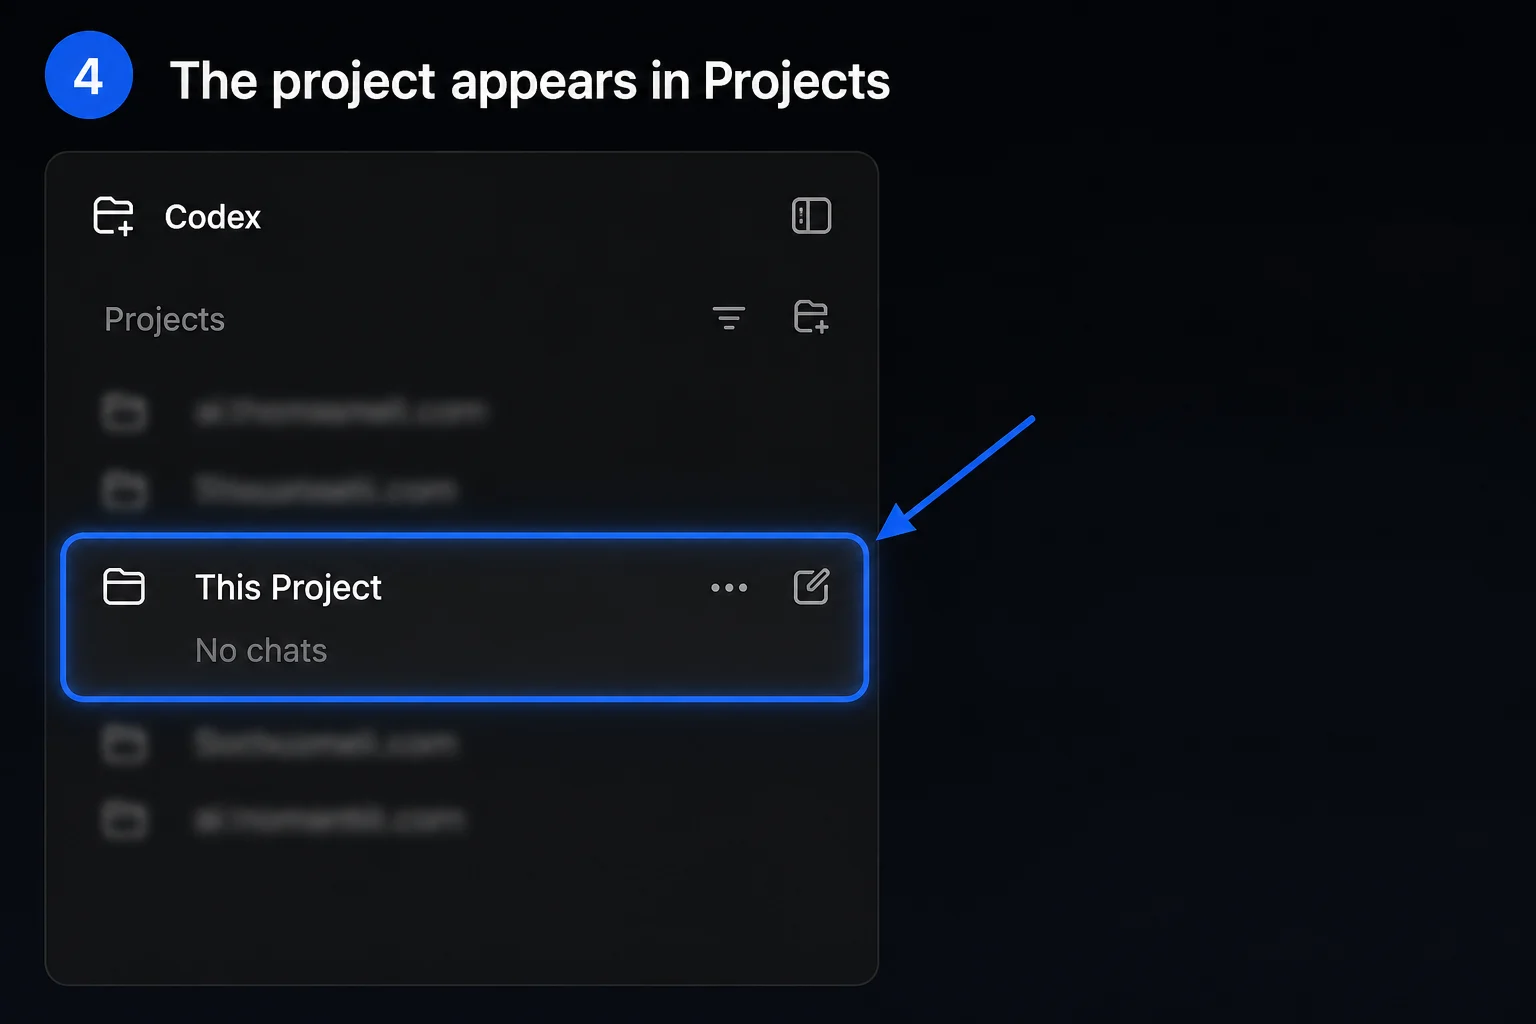
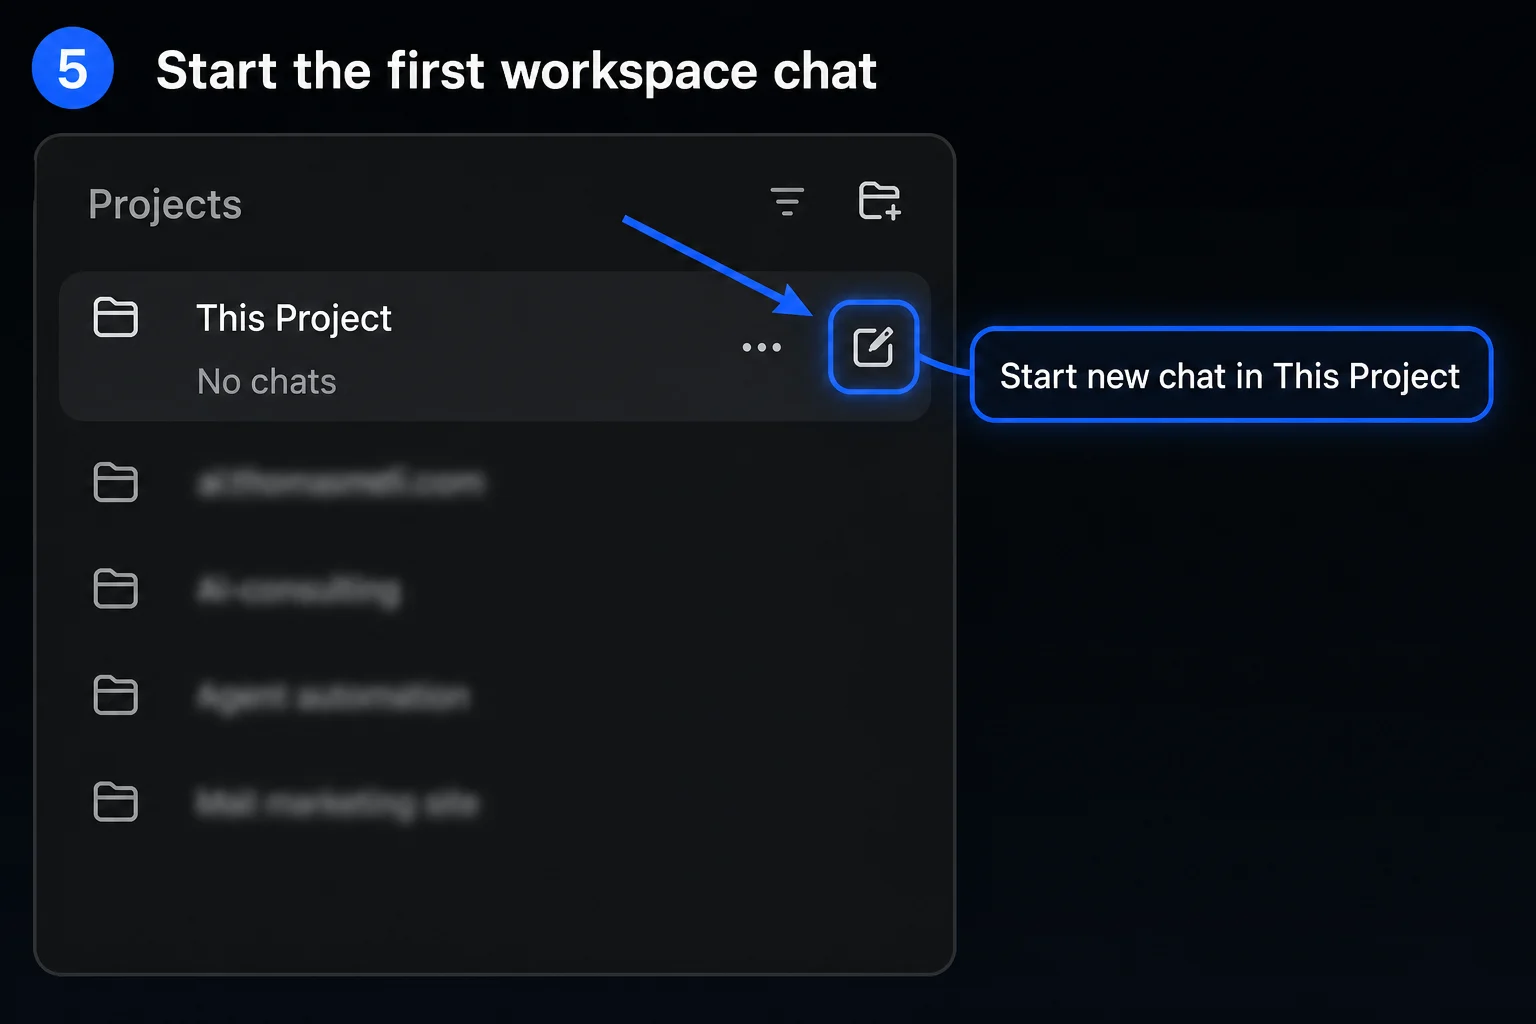
Look for "No chats" to confirm the folder is attached
Look in the `Projects` section of the Codex sidebar. You should see `This Project` listed there. The label "No chats" underneath means the folder is attached and Codex can reach its files, but you have not started a conversation in it yet. That is exactly right at this point.

- 5
Start the thread from the project row so Codex connects to the folder
Hover over `This Project` in the sidebar and click the new-thread icon that appears on the right side of that row. A text input area opens, already connected to that project folder. If you start a thread from somewhere else in Codex, it will not have access to the folder you just set up.
Tip: Starting a thread from outside the project row creates a general-purpose conversation that cannot see your project files. Always start project threads from the project row.

- 6
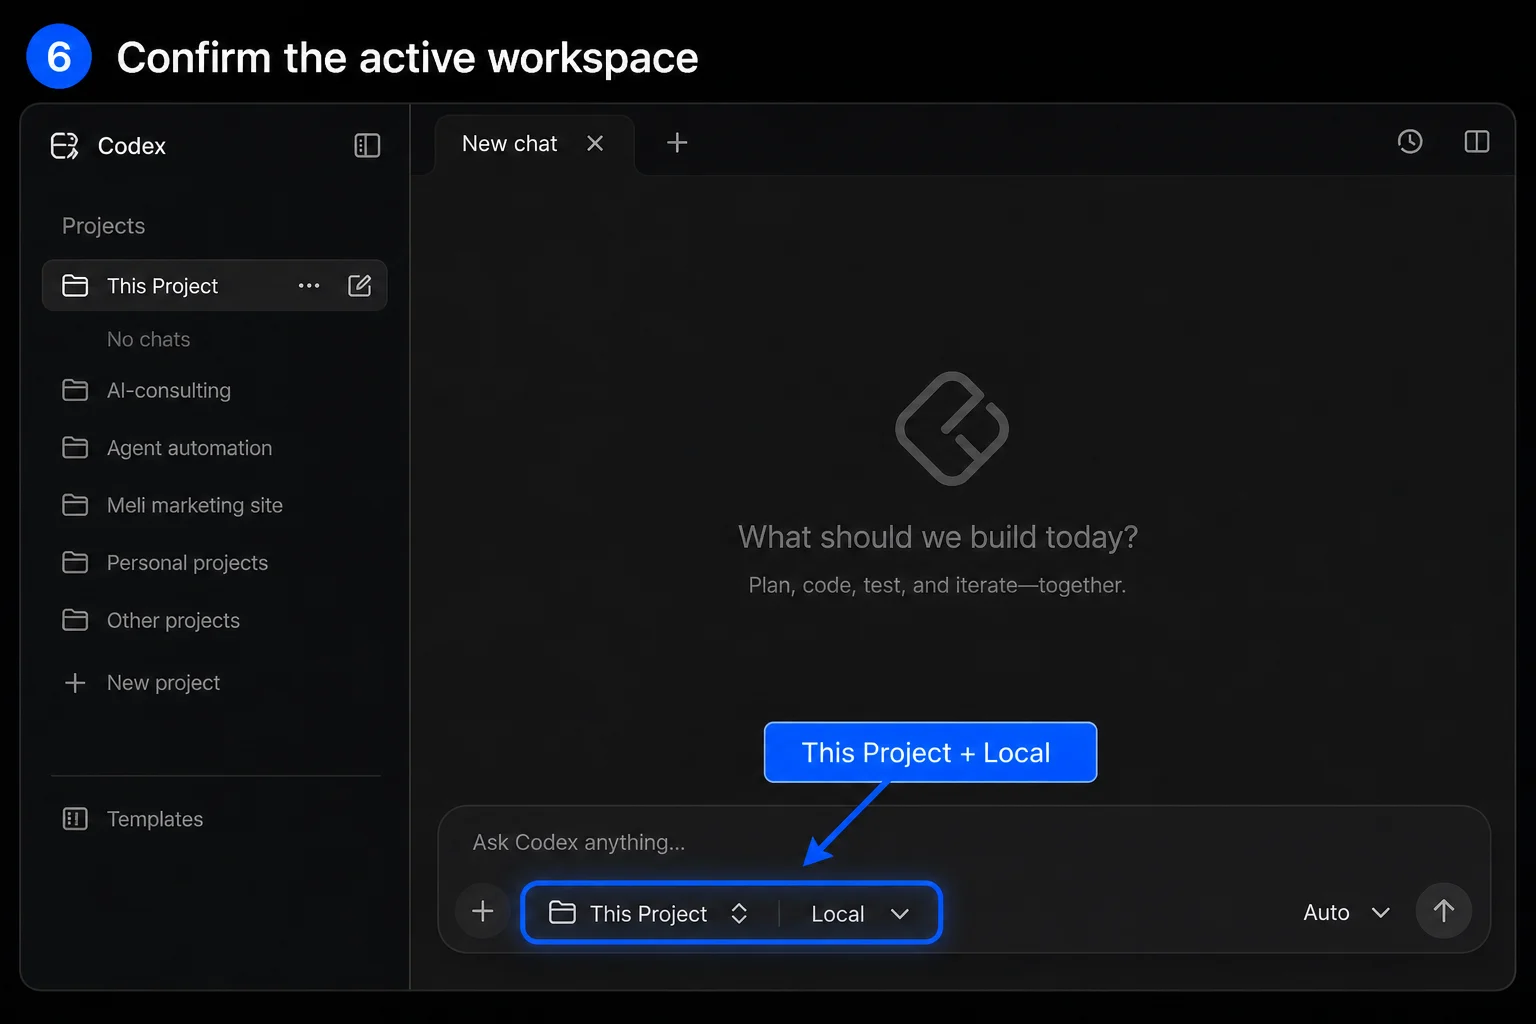
Confirm the project name and Local mode before sending your first message
Before you type anything, look at the top of the thread. It should show `This Project` as the project name, and `Local` should be selected as the mode. If either one is wrong, Codex will work in the wrong folder or the wrong mode, and your files will not be where you expect them.
Tip: Codex offers three modes: `Local` reads and writes files directly in your folder. `Worktree` creates a separate copy of a Git repository for isolated changes. `Cloud` runs tasks on a remote server. For working directly with files on your computer, select `Local`.

Official guidance checked
All official docs referenced on this page were checked to confirm accuracy and current instructions.