Walkthrough
Create a Claude Cowork Project from a Local Folder
Cowork lets Claude work inside a folder you choose on your computer. Attach the folder, approve access, add standing instructions, and reopen the project from Cowork whenever you need it.

Use the local folder first, then save it as a Cowork project
- 1
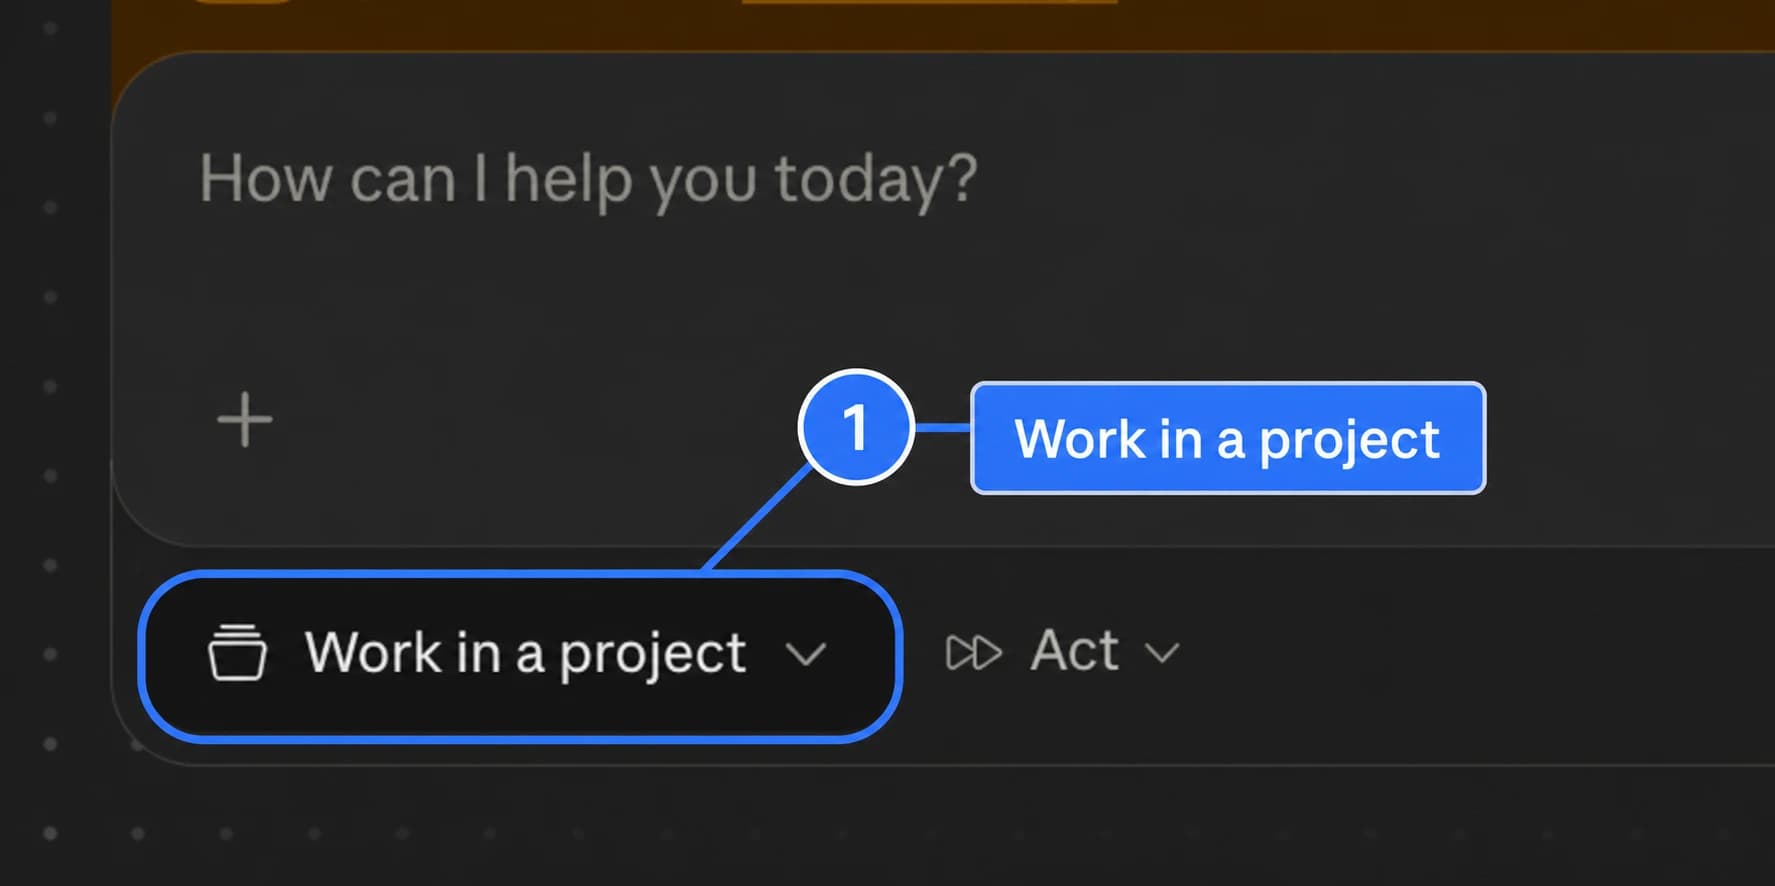
Use the folder button to choose where Claude works
- 2
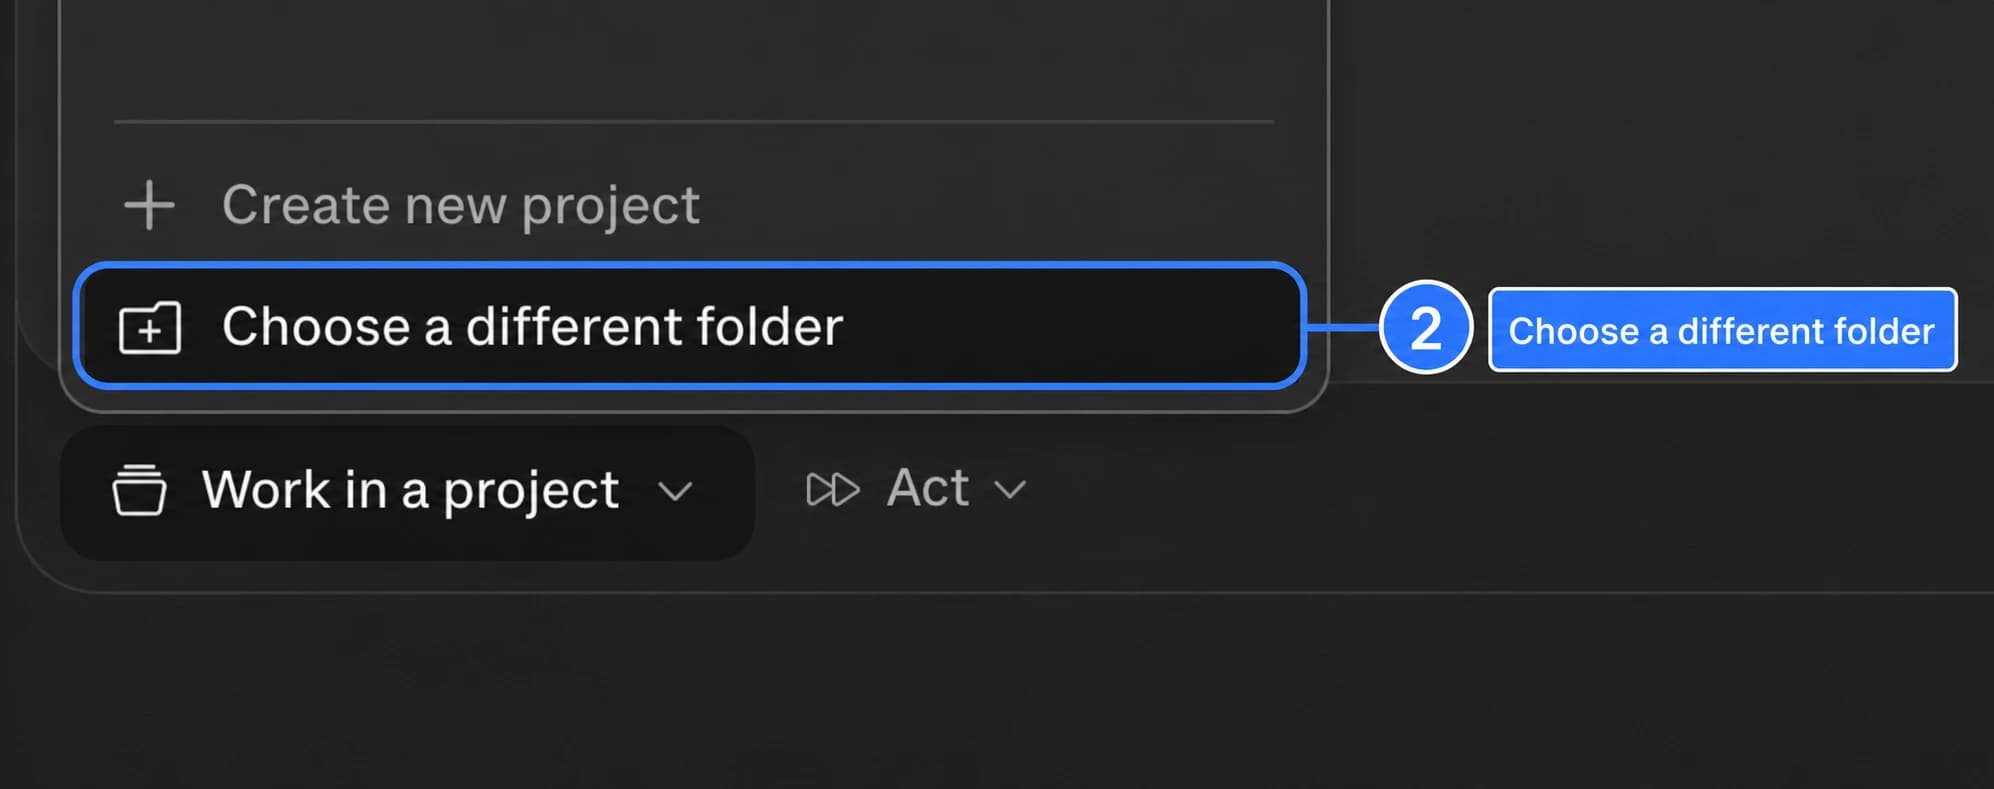
A different folder lets you point Claude at the real project
- 3
Cowork is where local projects live
- 4
The project stays one click away
A Claude Cowork project for `This Project` saved in Projects, with the local folder mounted and project instructions ready for future sessions.
Attach the folder, approve access, and save it as a Cowork project
- 1
Use the folder button to choose where Claude works
Claude needs a folder boundary before it can work with local files. Click `Work in a project` underneath the composer. Claude opens the project menu so you can choose where this session should work.
- 2
A different folder lets you point Claude at the real project
You already have a folder on your computer, so you do not need Claude to create a new one. Choose `Choose a different folder` from the project menu. macOS opens the folder picker.
Tip: `Create new project` is useful when you want Claude to make a new folder. Pick `Choose a different folder` when the folder already exists.

- 3
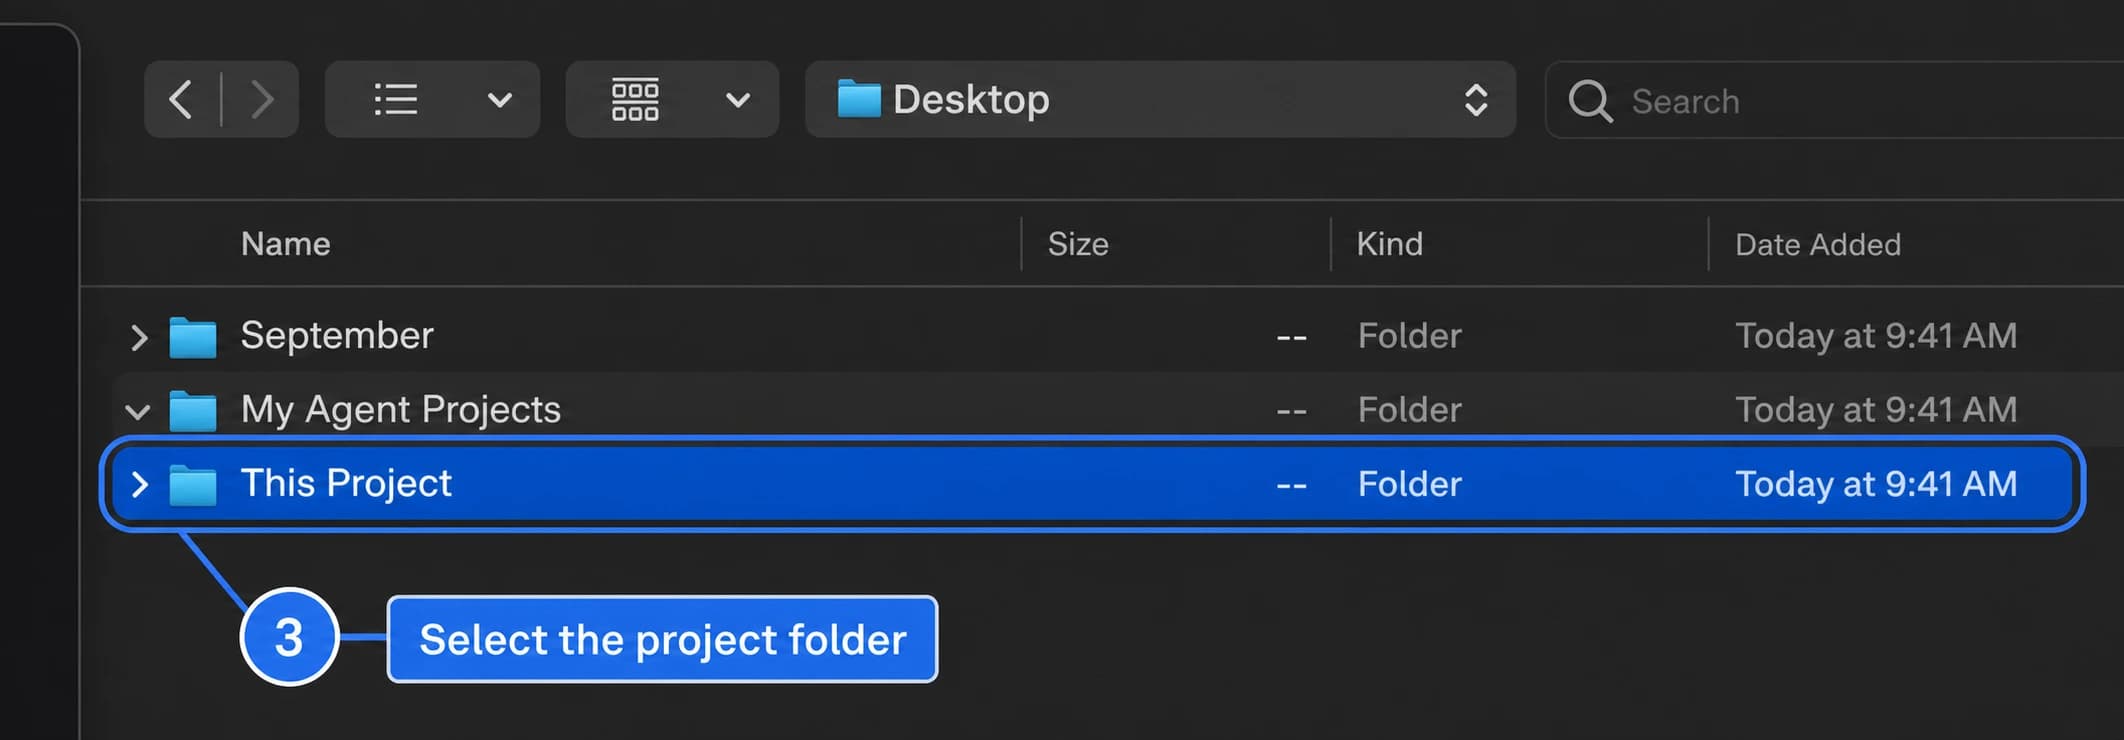
Pick the project folder itself, not the organizer around it
Select the specific project subfolder, not the parent. In the folder picker, open `My Agent Projects` if you use one, select `This Project`, and confirm. Claude asks whether it may access the selected folder.
Tip: The example names are placeholders. Use the real folder name for your project.

- 4
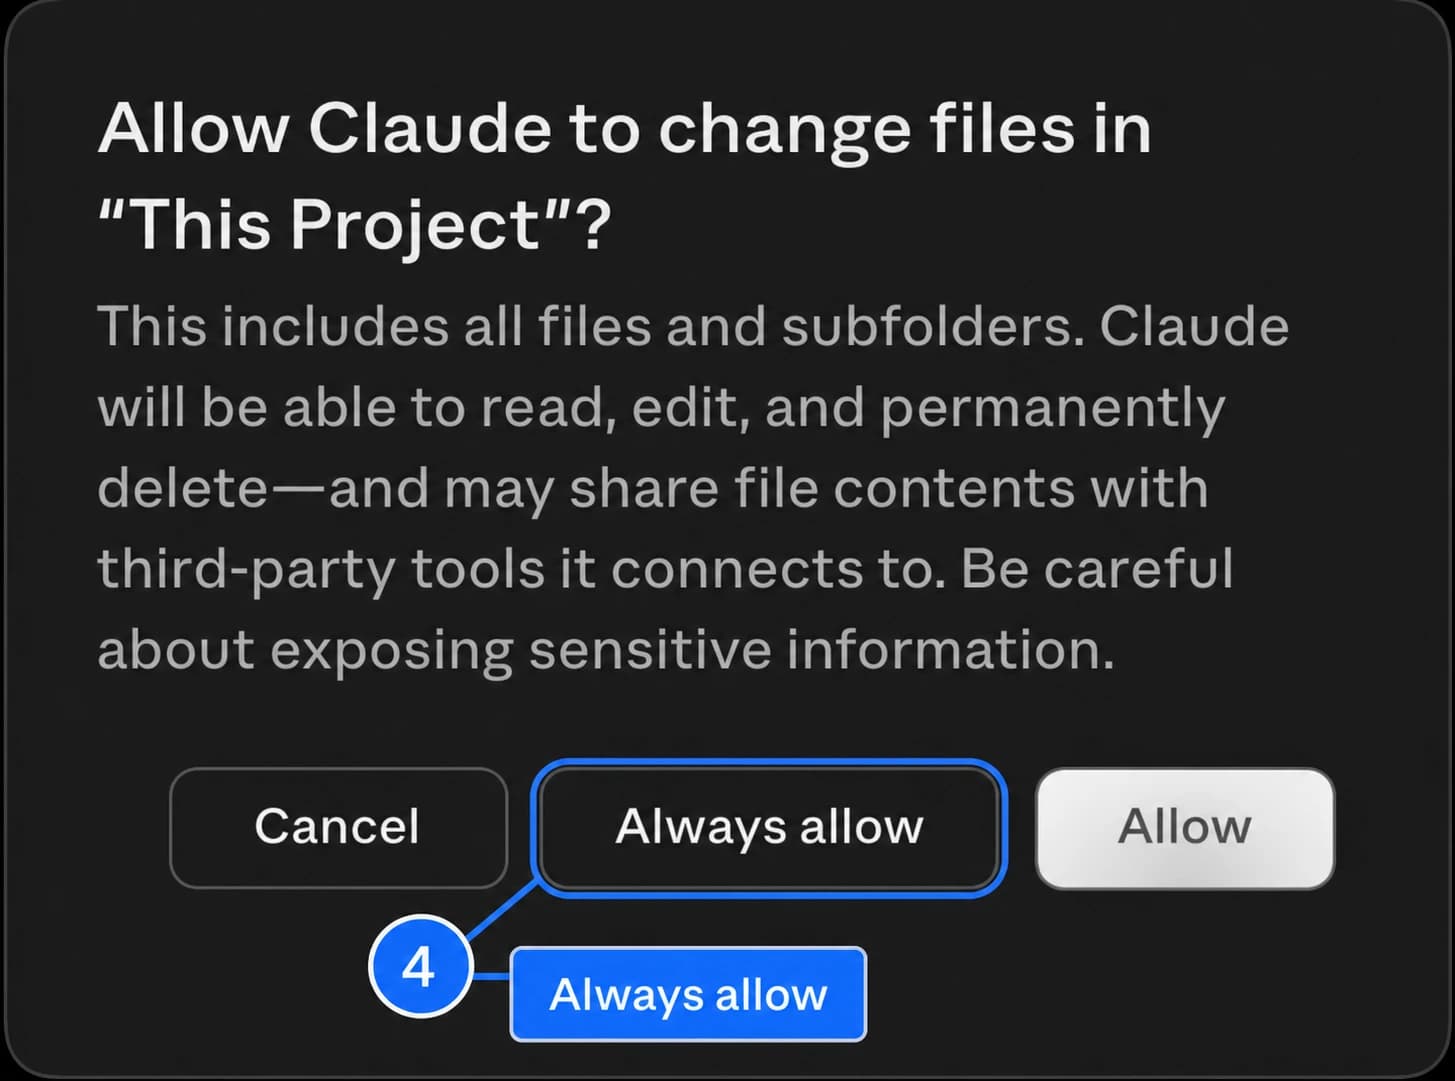
Permission should match the folder you meant to share
Claude can only work with local files after you grant folder access, and the permission dialog is the moment to confirm you picked the right folder. If the dialog names the correct folder, click `Always allow`. Claude can use that folder without asking again each time you start work there.
Tip: `Always allow` gives Claude read and write access inside that folder. Use a narrower folder if the selected folder contains unrelated private material.

- 5
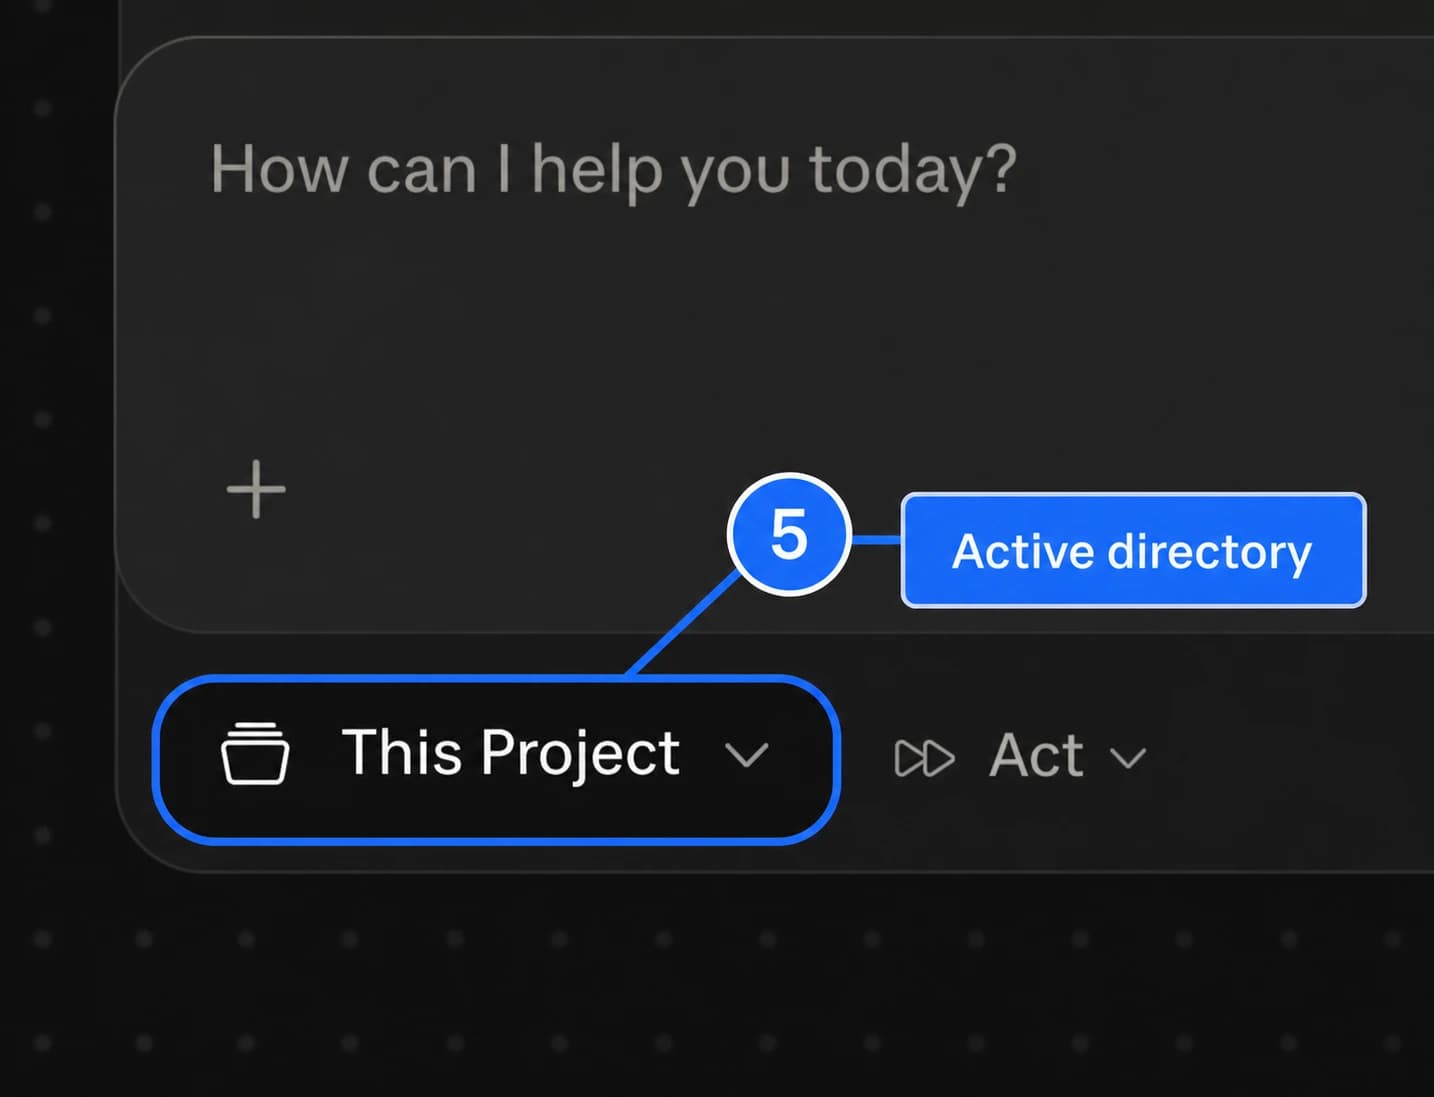
The active directory should show the folder name
This quick check prevents you from asking Claude to work before it is pointed at the right local files. Look under the composer and confirm the folder button now says `This Project`. The folder is active for the current Claude session.

- 6
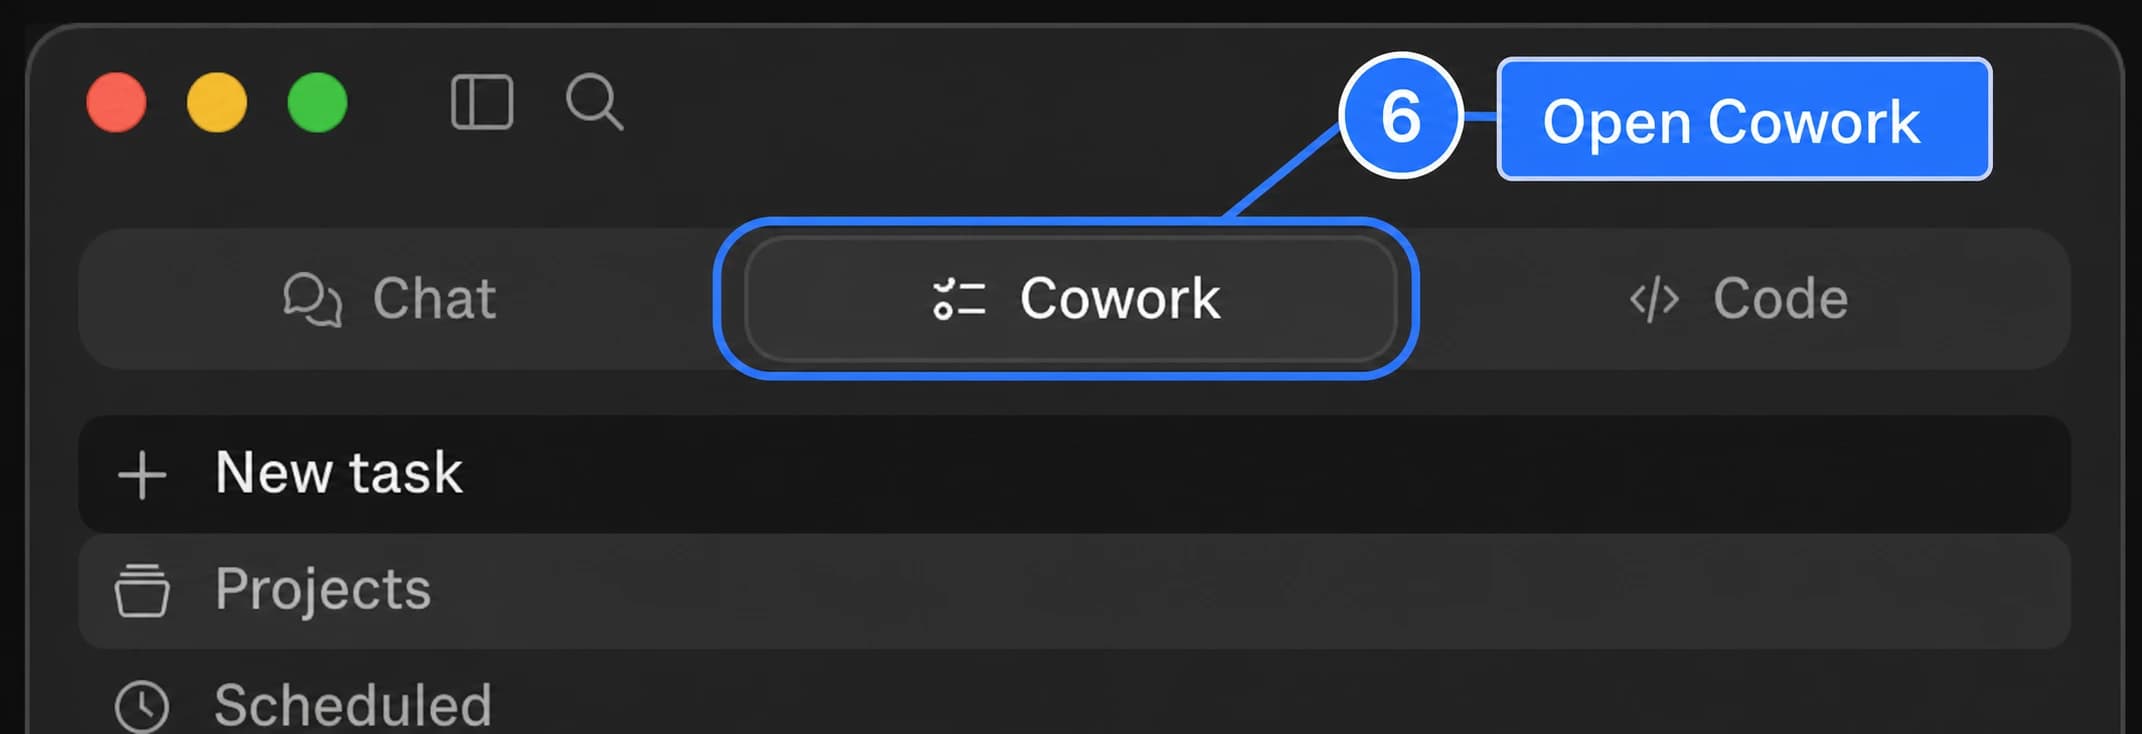
Cowork is where local projects live
The folder session is useful right away, and a saved Cowork project makes the setup reusable with the same folder and instructions available later. Open Claude Desktop and click `Cowork`. Claude shows the Cowork workspace.

- 7
Open Projects to save the folder as a reusable workspace
The Projects view is where Claude stores named local workspaces, so you can return to the same folder without rebuilding the setup. In the Cowork sidebar, click `Projects`. The Projects page opens.


- 8
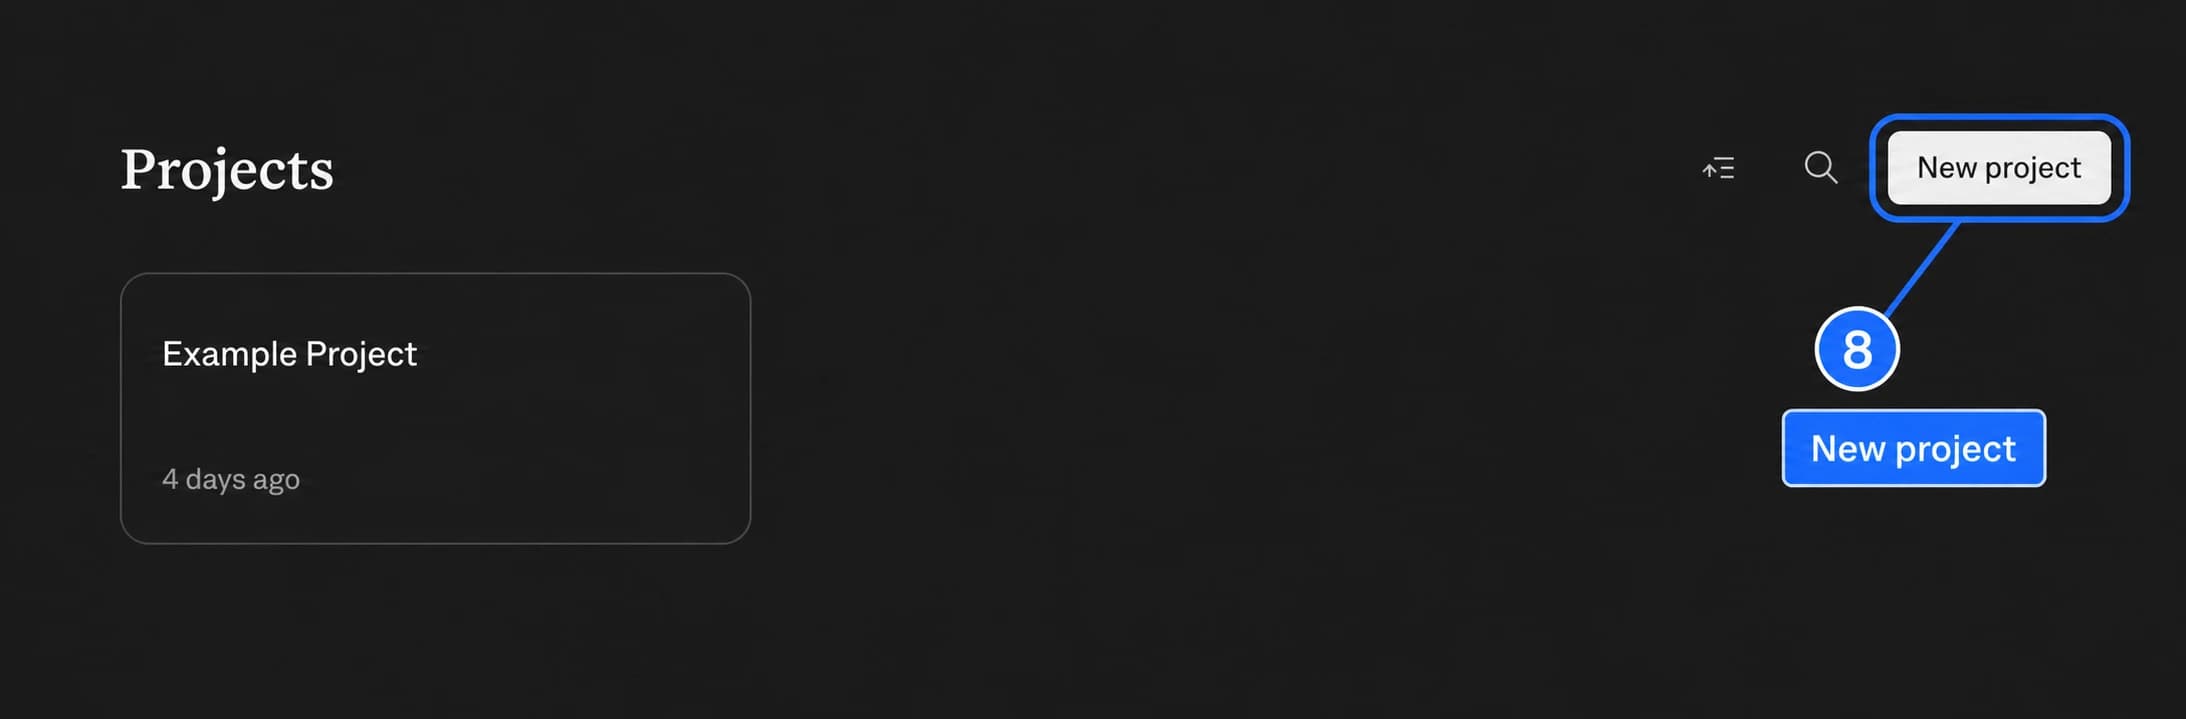
Click New project to begin a saved workspace
A saved project gives the folder a name, instructions, and memory that belong to that area of work. Click `New project`. Claude opens the project creation dialog.

- 9
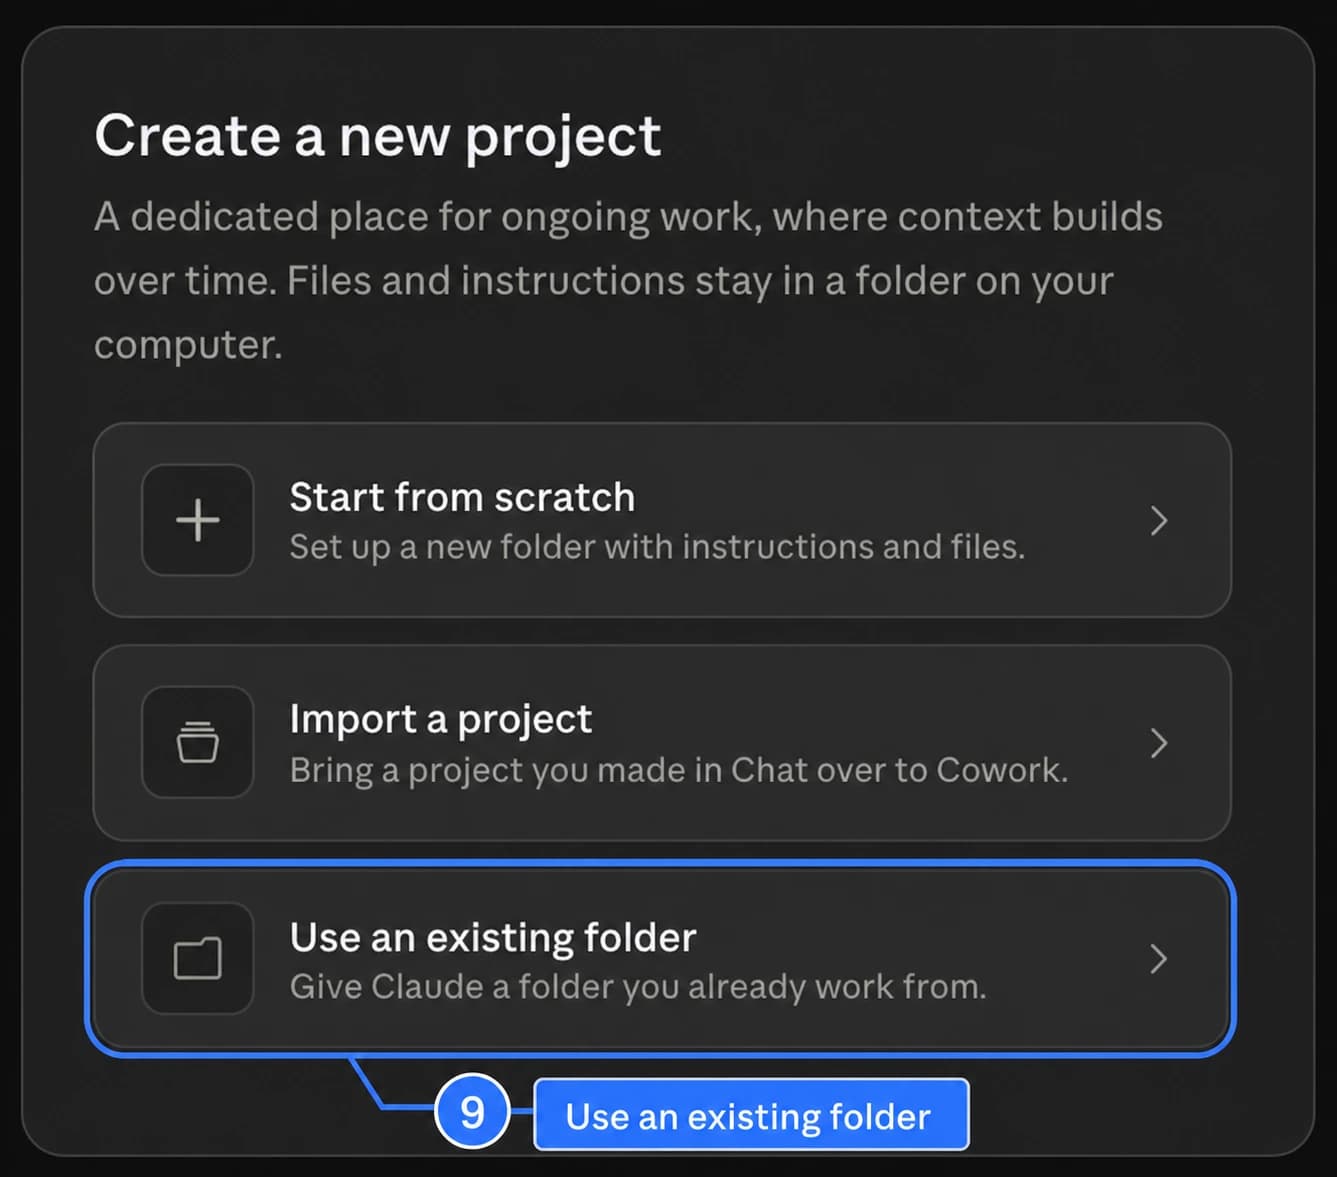
Use the folder you already work from
You are saving an existing local folder as a Cowork project, not asking Claude to create a new folder or import a Chat project. Choose `Use an existing folder`. Claude opens the folder-based project form.
Tip: `Import a project` brings a Claude Chat project into Cowork. `Use an existing folder` is the local-folder path.

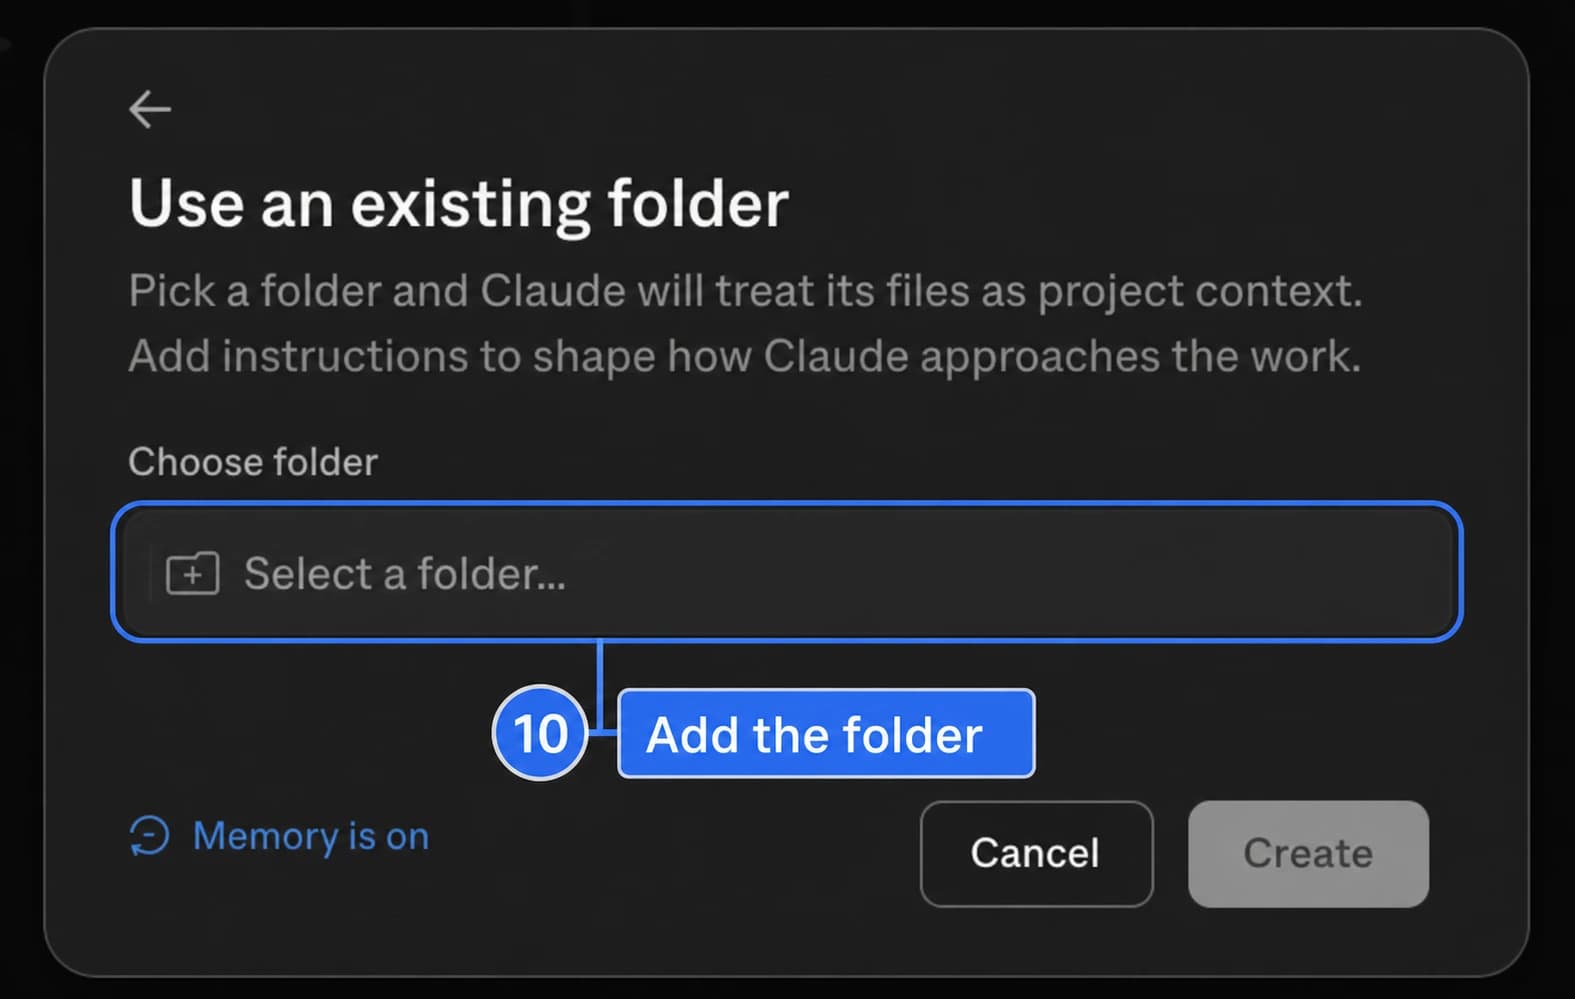
- 10
The folder field mounts the local files
This field tells Cowork which files belong to the project. Click `Select a folder...`, choose `This Project`, and approve the folder picker. The form shows the folder path, the project name, and the instructions field.

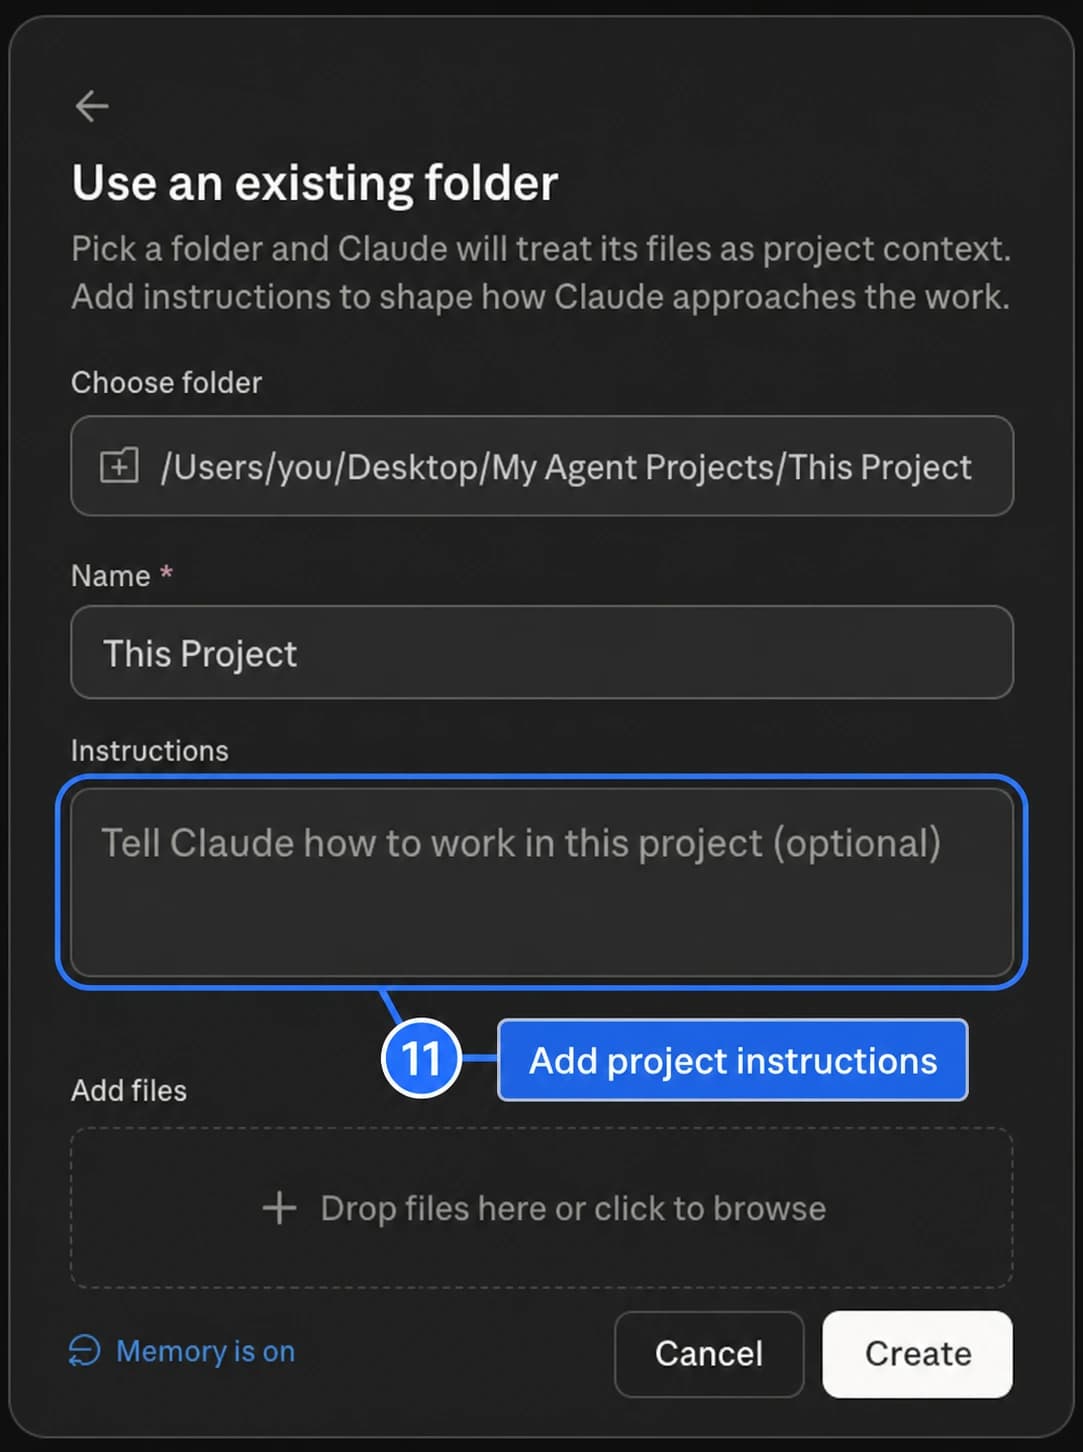
- 11
Instructions tell Claude how to behave every time
Add important information about the project: what it is for, what files matter, what Claude should avoid changing, and any privacy boundaries. Claude now has the local folder plus the rules it should use while working there.
Tip: Keep instructions specific to the project. General preferences belong in your broader Claude instructions.

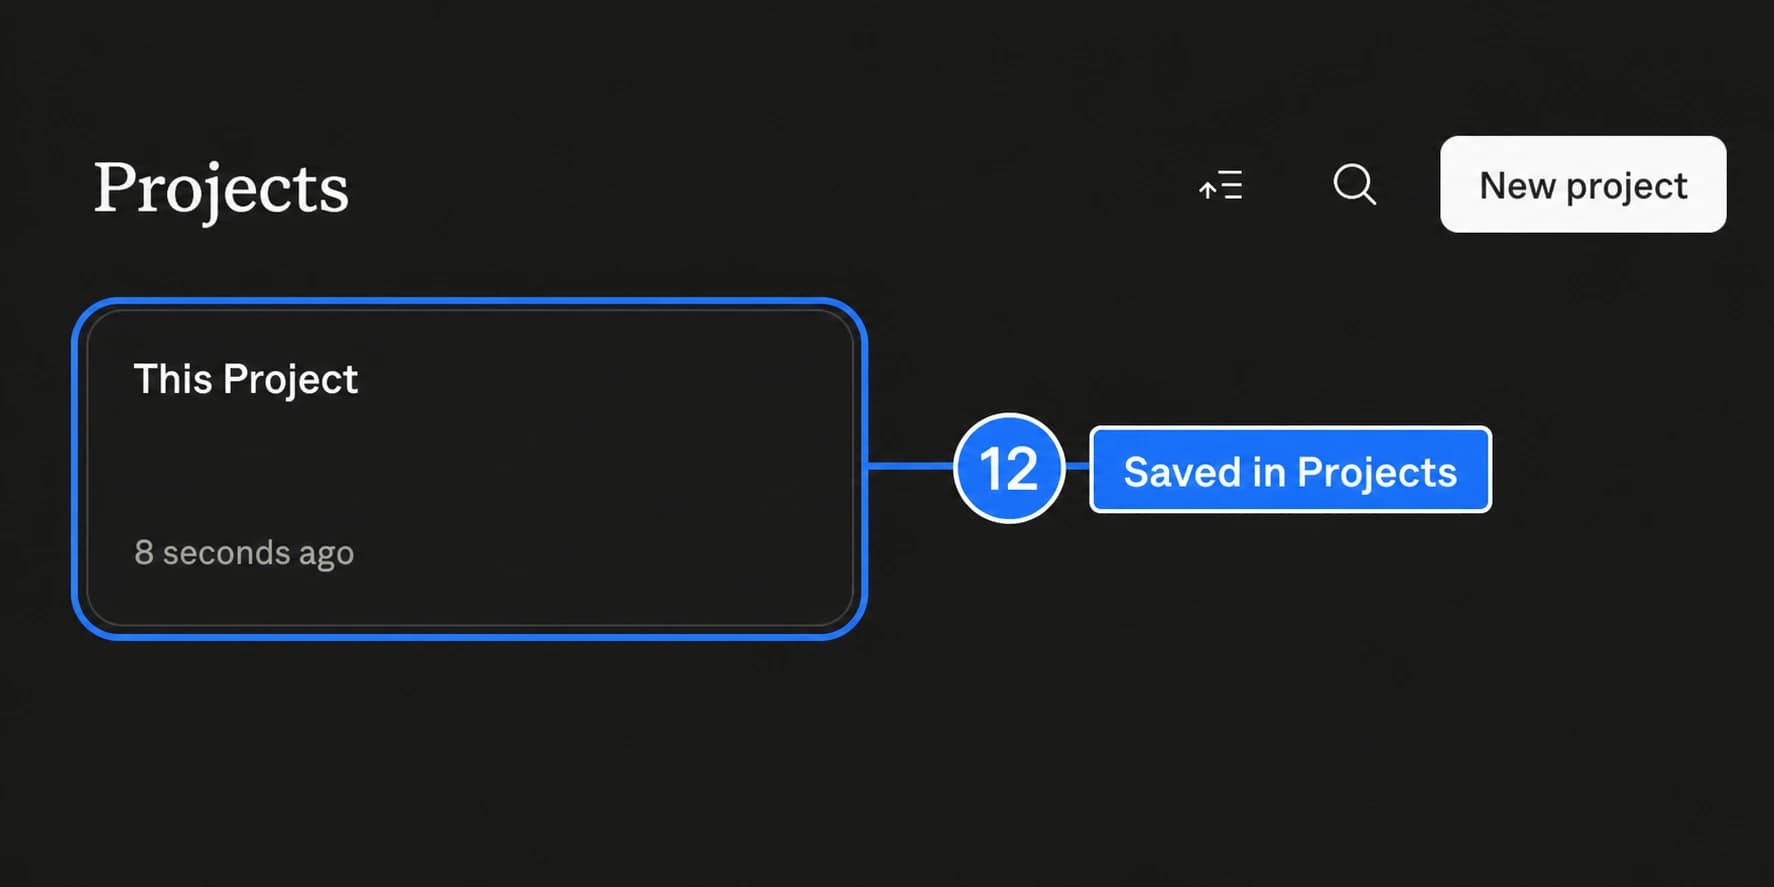
- 12
The project stays one click away
Once the project is created, you do not have to repeat the folder setup each time. Click `Create`. Later, open Cowork, click `Projects`, and choose `This Project` whenever you want Claude to work there. `This Project` appears as a saved Cowork project.
Tip: Cowork projects are local desktop projects. If you need a project shared through Claude Chat or teammates, use a Chat project deliberately instead.

Official guidance checked
All official docs referenced on this page were checked to confirm accuracy and current instructions.